Showing posts with label manicure. Show all posts

Mini Mani Manor- Blogmas Day 1


Can you believe that December is here already? It seems like only last week we were celebrating the start to the new year. I swear the older I get the faster the years go!

I am so excited to start blogmas again! It was one of my favourite blogging moments last year, and it made me fall back in love with blogging all over again. I have some exciting ideas for the next 25 days which I can't wait to share with you all! Christmas is after all one of the BEST times of the year!

What better way to start blogmas than to show/discuss advent calendars. Personally I think that there should be an advent calendar for the count down to advent, (who's with me?!?!), but it is such a great way to countdown to the big day!  Last year was the first time that I really got involved with the whole beauty advent calendars. (I can't get over how expensive they are!) I have actually had this calendar since last January. I picked it up in TK-Maxx in their post christmas sales. I just love the Ciate nail varnishes so being able to try out 25 mini's is perfect for me!


I also love the classic chocolate advent calendars, and you best bet that I am going to be opening this every morning before breakfast!

I hope you enjoyed this post!
Have a lovely day!


Sensationail gel manicure review!


 As a 'beauty blogger', you can imagine the amounts of products I have tried out to create that perfect manicure look. From gelly polishes to gel topcoats nothing has quite given that salon manicure, nothing that is until I tried the Sensationail kit. The idea behind this little gadget is that you can do your own salon manicure in the comfort of your own home. When I first tried it I was a little bit skeptical. How can you create that perfect long lasting mani by yourself! I tried it out a couple of times. Once I had perfected the whole process I was amazed at how long it lasts. It says on the box that you can have perfect nails for up to 2 weeks. This was never the case with normal varnishes. 

It is so easy to create and it is pretty much fool proof. The polishes themselves are an investment priced at £15 each it isn't your £3.99 drugstore one, but as soon as you have purchased a few they last a really long time. The idea behind me wanting the set was that I would be saving myself money in the long run as I wasn't having to go to the salon each month to get them done. You can buy the set from a variety of places. I got all of the bits together for christmas from my parents from boots, (You can buy that set HERE) but you can buy it all separate as well online along with the different colours. 

I thought I would show you how easy it is to create that perfect mani! 


The kit works in the same way that you would get it done in a nail salon. You prepare your nail then use the base/top coat and cure it for 30 seconds under the lamp. You then apply two coats of the colour curing between each one for 60 seconds again. Then you apply the base/top coat again and cure it for another 30 seconds. Finally you use the lint free wipes with the cleanser and wipe off any of the excess from the top of the nails. You are then left with nails that will not smudge or budge for at-least 2 weeks. 

I took a picture of my manicured nails using 'Coral Sunset' for two weeks to show how well they held up! 
I took this picture of my nails on the day of painting them. You may have spotted them in my recent Pandora ring post!

This was a photograph uploaded to my Instagram after the first week of having my nails done. During the week I had been at work lifting boxes and doing craft!  
This image shows my nails after the end of the second week. The only noticeable thing are the small gaps where my nails have grown. This is the only issue that you can see. My nails were chip free! 
I hope you enjoyed reading my little review on this nail kit. I couldn't recommend the Sensationail kit anymore! If you are looking for a gel kit investment then you really need to try this out! I can't wait to buy some more colours such as a classic red colour. 

Thanks for reading! 
Lots of love, 


Manicure Monday!

Happy Monday!
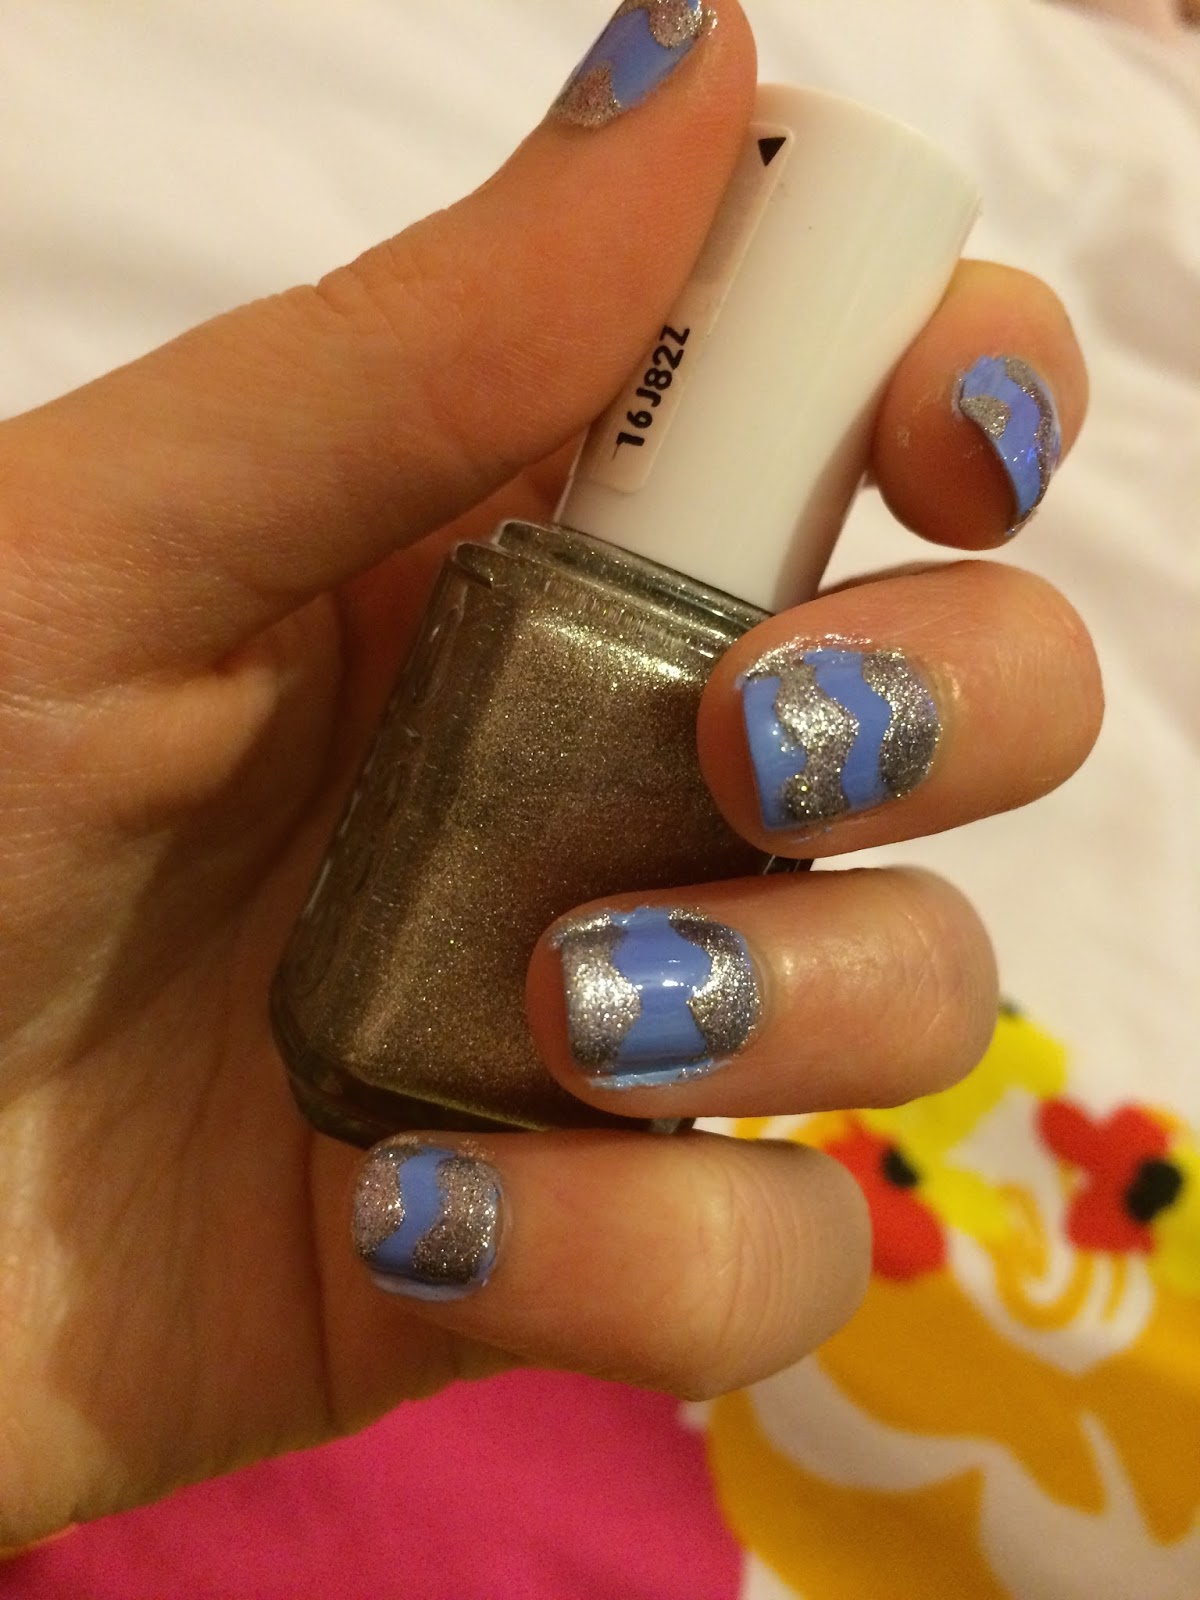
Hope you are all having a lovely morning (so far!). Earlier on in my blogging days I used to post frequently with a 'Nail of the Day' every monday. This was something I enjoyed doing as I had more time painting my nails. Since uni started I have found less and less time to change up my nails! Seeing as Uni is coming to an end I am going to get back into these posts and I can't wait to share some designs with you!
I took this picture as soon as I had painted my nails so the edges hadn't been cleaned yet! 


This design is pretty simple. I used Essie polishes in 'bikini so teeny' and 'beyond cosy'. To get the zig zag shape I used pinking shears (Textile scissors) and cut strips from some masking tape and placed it over my dry colour. When I had the design I liked I sealed it with Essie's topcoat.

Hope you like this design and have a lovely week!


Manicure sunday?


Now I know that usually you are supposed to post your manicure Monday blogposts on a Monday, but I was far to excited about this post! I am going to share my first (I think) nail tutorial! This is something that is very easy to do but looks really complicated when finished on your nails. It is also a nail tutorial and design that you can very easily do on yourself!

What you need for this tutorial are three colours which compliment each other really well. I went for Pink, Lilac and dark purple. I also got a base/top coat and a sponge. You can also use a makeup sponge if you don't have an painting sponge.

First step is to paint your nails with a base coat. This helps the nail varnish to go on smoother and also protects your nails from staining.
Then you need to paint your nails of the colour you have decided to be the base of the design. I went with Barry M's Gelly Hi Shine varnish in Grapefruit.
Then you need to apply some of the next colour you want to use onto your sponge. You really don't need very much on the sponge. Then begin to dab it onto the top of your nail and slightly gradient it down into the pink. You need to make sure that the pink polish is fully dry before doing this step. I used Barry M Nail paint in Berry.

Finally you need to add some drops of your final colour onto your sponge and then dab it right at the top of the nail to get a little of the colour onto the nails. Seal this in place with a topcoat when finished. The Purple I used was a small polish from No7 Collection.
I love how this design looks on the nails. It looks so chic and effortless that it is one that I think will be a reoccurring thing on my nails throughout winter. I am going to try this design out with other colours too, although these three together may be my favourite!


Let me know if you try out this design. I would love to see your results, Tweet me at @bellamomentox
I hope you let me off for posting my manicure Monday post a day early! 
Thanks for reading!
xoxox